Author Topic: Project "Wing-It"  (Read 14623 times)

Offline gdowling

  • Level 2
  • **
  • Posts: 150
Project "Wing-It"
« on: 08/25/09 - 12:15PM »
Ok everyone here is Project "Wing It" if you will. Keep in mind as you are going thru these pictures that this is the first project of this type that I have ever taken on, so this is very unfamiliar territory. The pictures are in no order which really sucks but this is the order of operation that got me to the point I am at now.
   
First I started by removing tube bumpers, all the paint, body putty, and rust from the side panels, tail end, hood, and front cowl. I learned very quickly that since my plan was to cover up the sides anyways with treadplate that i had made a hell of alot of extra work for myself. Second I tried to remove all rust with angle grinder (I also sprayed it with rust stopper). Next I used wire mesh and body putty to fill in some of the old rust spots - however since the sides were getting plated anyways I didnt spend alot of time getting them perfect. I tried to spend the extra time and effort on the places that were going to be visible.

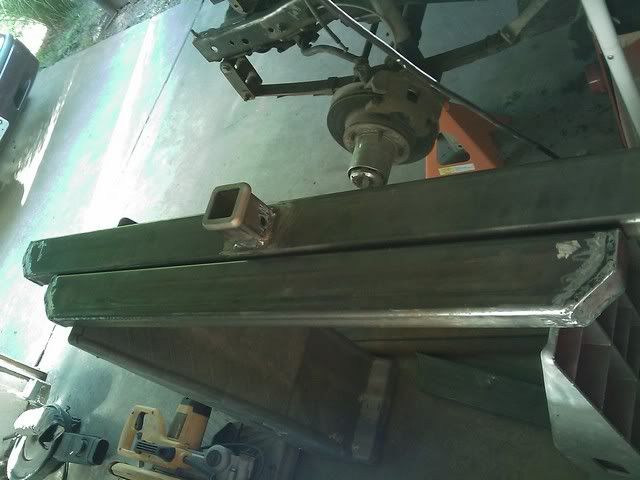
Next, I sprayed both sides, tail gate, inside of fenderwells, and all the the frame with undercoating. I then built the bumpers out of 2"x4"x3/8" steel. Next I traced the side panels on to a 4'x8' sheet of 11 gauge steel treadplate, I had a neighbor plasma cut them out at his shop. Built some rocker panel/running boards out of 2"x3"x3/8" angle. Next I recieved my DIY tube fenders that I ordered from Blue Torch Fab.

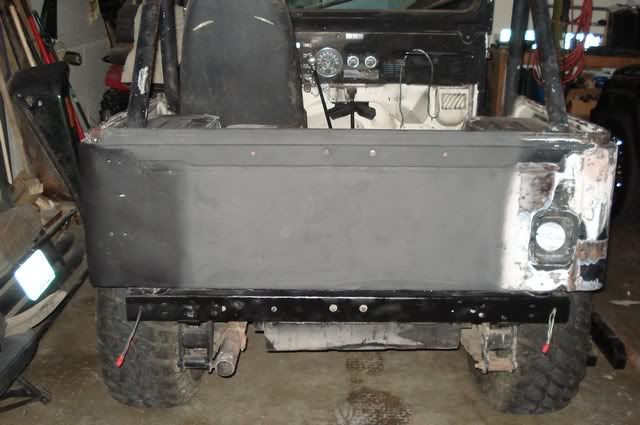
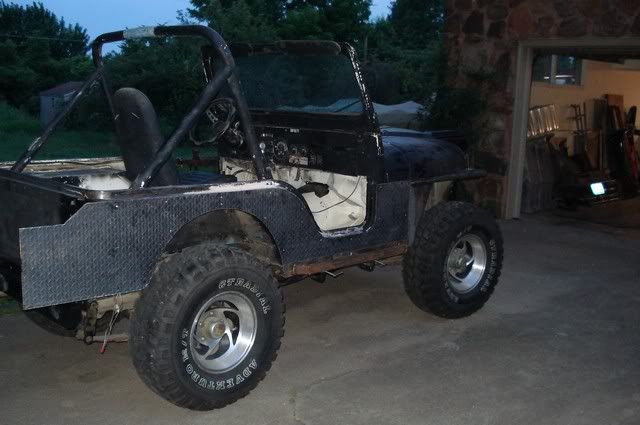
There is some pics of the the bumpers and fenders being held on by bungie cords because I wanted to see what they were going to look like. Next I welded up the fenders and got them mounted. Then I started to attach the treadplate, I used the biggest rivets I could find to suck it up tight, there are approximately 80 rivets holding each side panel on. The corners I heated with a torch and bent them around by hand (BIG PITA). I cut out holes for the after market tail lights and got them mounted in place. Got all of the exterior minus the windshield frame under primer.
   
For those of you who dont know I traded Aaron a CJ tailgate for some xj Springs to stretch the rear end, well I couldnt do this yet because the pumpkin was going to be hitting the gas tank, so I spent last weekend recessing the gas tank and that is where I am to this point. I still need to build a housing for it and a skid plate to protect the bottom of it. Next is stretch this bad boy. Any and all advice is welcomed.

http://s660.photobucket.com/albums/uu323/gdowling/   -   This takes you to all of my pictures!


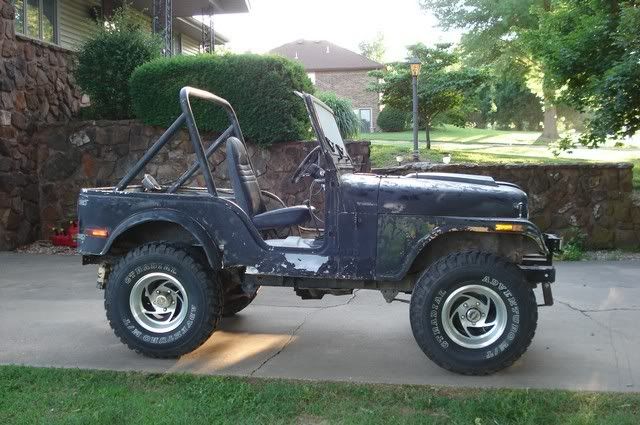
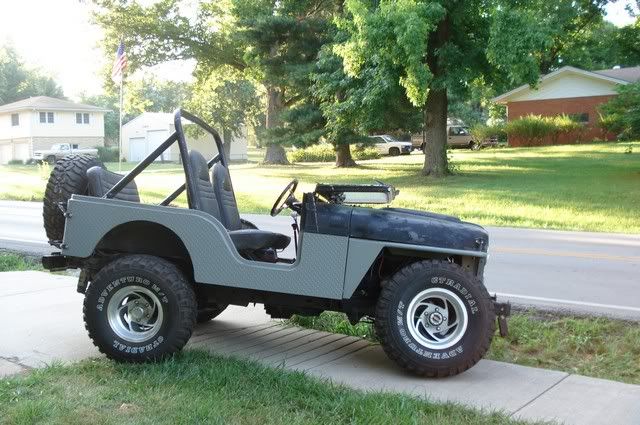
This is basically what it looked like when I started minus the bumpers.

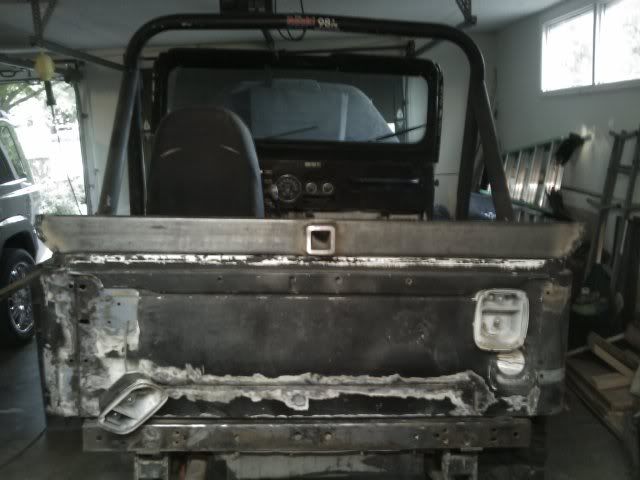
Removing some rust and the old tail lights.

After I did some body work. This is basically what I did on both side panels as well.

Here at the bumpers I built that I was refering to earlier.

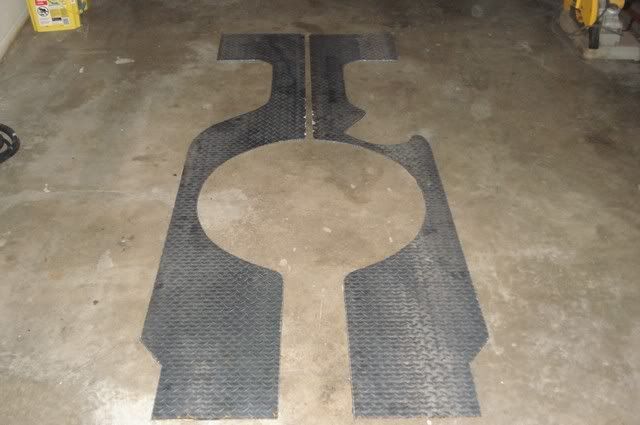
Here are the side panels after they got cut out.

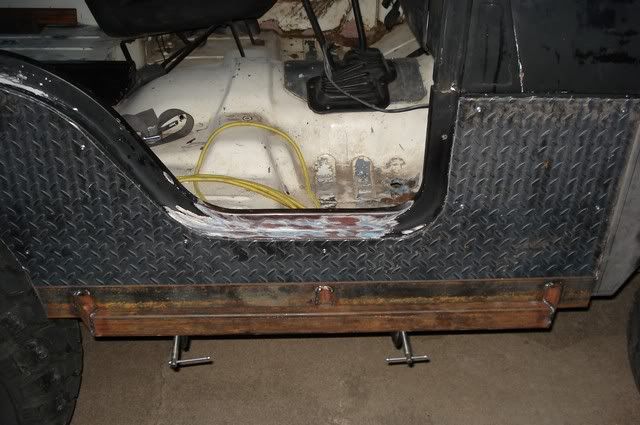
These are the rocker guards/running boards I built.

This is after I got the passenger side tread plate on. As you can see I haven't got the corner bent yet.

I mocked up the new DIY fenders to get a feel for what they would look like.

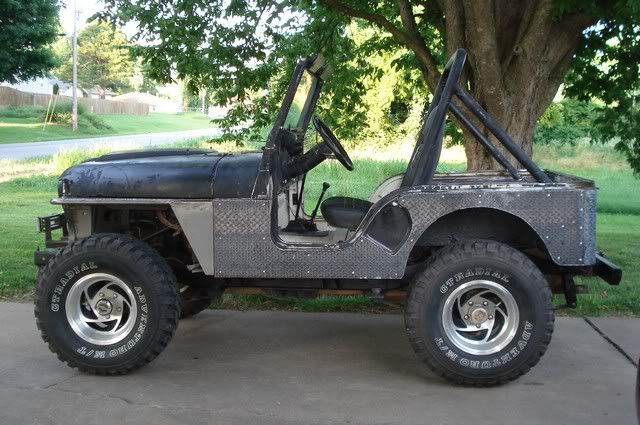
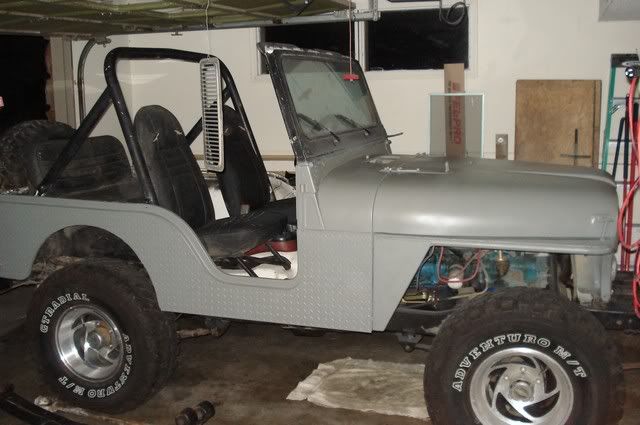
Here is a shot with tread plate, and fender on and ready for primer.

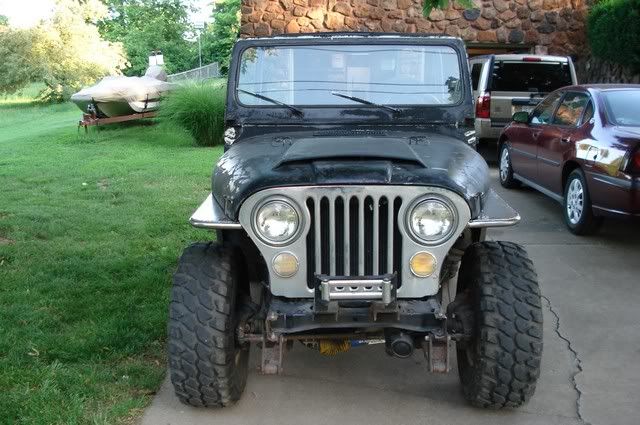
A look at the fenders from the front.

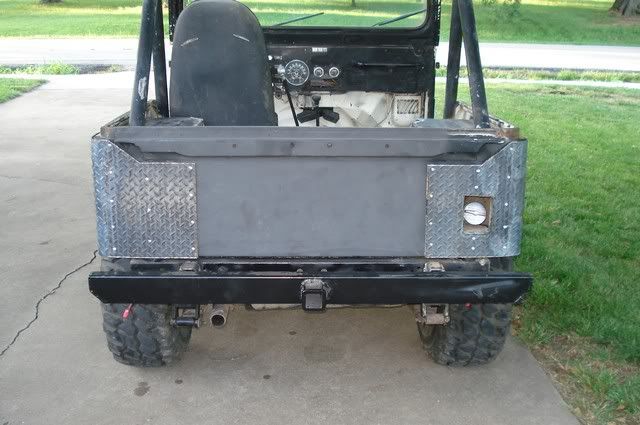
Rear shot after corners got bent.

The new tail lights that I installed. Whoever wired this thing up before I got it had it all cobbled up. (PITA)

Poser Flex, right after I took off the sway bar.

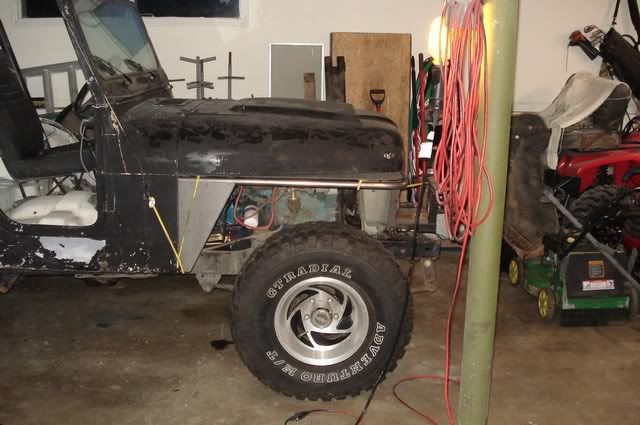
All primed up, and ready to reinstall hood scoop and cowl vent.

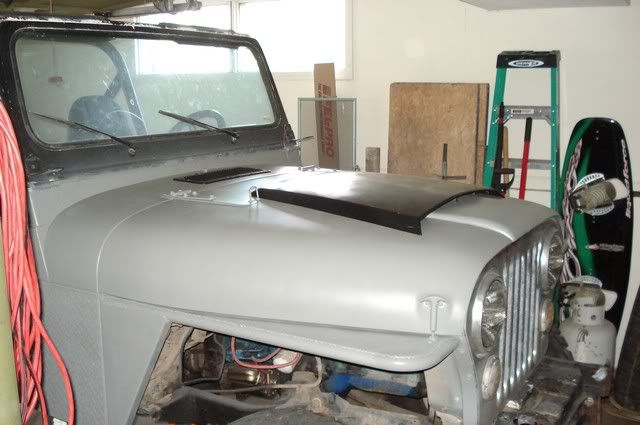
With scoop and cowl vent cover.

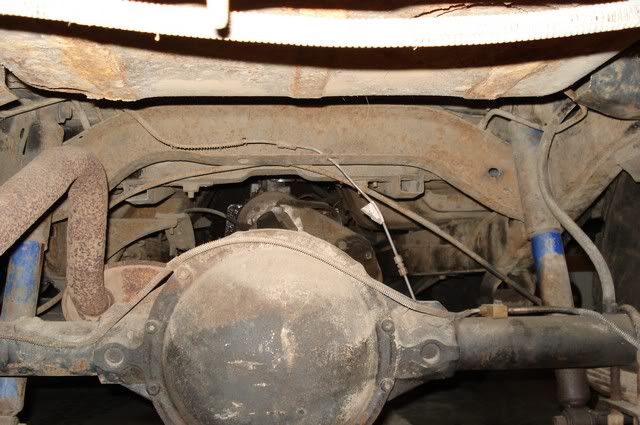
I gained about 8 inches of clearance from the bottom of the gas tank to the top of the pumpkin with the recess.

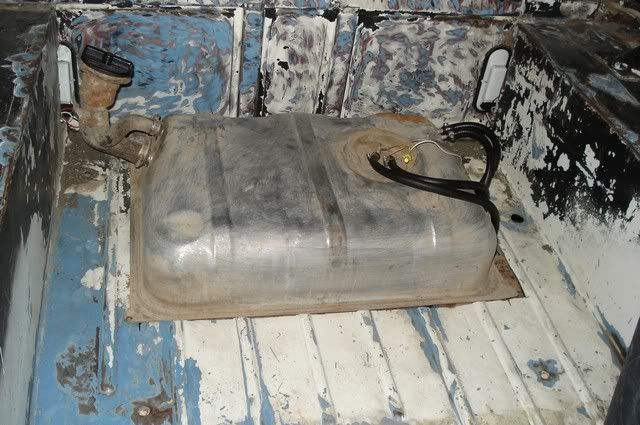
The tank in its final location.


Thanks "Lonewolf" for showing me how to post pics - much appreciated!

« Last Edit: 08/25/09 - 04:41PM by gdowling »
EMAW

Offline YJ_Aaron

  • Level 5
  • *****
  • Posts: 4255
  • Jeep @ Disney
Re: Project "Wing-It"
« Reply #1 on: 08/25/09 - 12:32PM »
1 word... PARAGRAPHS
Is it possible for a jeep to ever truely be finished?<br /><br />Only the dead have seen the end of war---Plato

Offline gdowling

  • Level 2
  • **
  • Posts: 150
Re: Project "Wing-It"
« Reply #2 on: 08/25/09 - 01:03PM »
There you go - paragraphs!
EMAW

Offline YJ_Aaron

  • Level 5
  • *****
  • Posts: 4255
  • Jeep @ Disney
Re: Project "Wing-It"
« Reply #3 on: 08/25/09 - 01:05PM »
Now it should be much easier to read.  By the way love the posts on Pirate LOL.
Is it possible for a jeep to ever truely be finished?<br /><br />Only the dead have seen the end of war---Plato

Offline gdowling

  • Level 2
  • **
  • Posts: 150
Re: Project "Wing-It"
« Reply #4 on: 08/25/09 - 01:25PM »
Yea got an my A$$ chewed on that deal - but I dont GAF, kind of got a kick out of it.
EMAW

Offline LoneWolf

  • Level 5
  • *****
  • Posts: 2557
Re: Project "Wing-It"
« Reply #5 on: 08/25/09 - 01:28PM »
Nice work on the side panels.. Did you bend the rear radius yourself?
EVERY NORMAL MAN MUST BE TEMPTED AT TIMES TO SPIT ON HIS HANDS, HOIST THE BLACK FLAG, AND BEGIN SLITTING THROATS.

Offline gdowling

  • Level 2
  • **
  • Posts: 150
Re: Project "Wing-It"
« Reply #6 on: 08/25/09 - 01:33PM »
Yea I did it with a torch, I needed a couple torches and another set of hands - it was a real PITA!
EMAW

Offline LibertyPatriot

  • I vote for BACON!
  • Charter Members
  • Level 5
  • *
  • Posts: 1766
  • Web Wheeler!
Re: Project "Wing-It"
« Reply #7 on: 08/25/09 - 01:42PM »
Dude, did you keep the template for the side panels?  I could use some for my '5.
I'd put something funny here, but you probably wouldn't get it anyway...

Offline gdowling

  • Level 2
  • **
  • Posts: 150
Re: Project "Wing-It"
« Reply #8 on: 08/25/09 - 02:01PM »
Yea I still have them - I just used poster board, and you will have to do a little trimming but they will get you real close! pm'd you.
EMAW

Offline gdowling

  • Level 2
  • **
  • Posts: 150
Re: Project "Wing-It"
« Reply #9 on: 10/22/09 - 11:27AM »
Well I have been making a little progress lately. For some of you this little stretch I have taken on is probably second nature, but like I said before these are all firsts for me!

Anyways on to a brief explanation - Basically all I am doing is swapping out the stock CJ springs on the rear for some stock XJ springs, and while doing this I am hoping to knock out some general maintaince stuff as well i.e. u-joints, brakes, new bushings, bolts, new shocks, etc.

O' yea I had to attach a few pics of my new plasma and welder - pretty stoked about both!!

Here is a picture right after I got the axle disconnected.

This is a pic of the xj spring mocked up to see where the axle would sit and where the rear shackle would have to end up.

This is just a pic of the axle with the new springs on the axle, i sat the old one there to show the different lengths.

In this pic the fronts of the springs are back in place and the floor jack is holding the rest in place, just trying to get a better feel for what it is going to look like.

This pic us just showing how much the rear shackle is going to have to move to be reconnected.

Put a new U-Joint on the drive shaft - not as complicated as I thought it would be!

My new Hobart Handler 187 mig!

And my new to me Lincoln Pro Cut 25 Plasma!

« Last Edit: 10/22/09 - 11:29AM by gdowling »
EMAW

Offline LoneWolf

  • Level 5
  • *****
  • Posts: 2557
Re: Project "Wing-It"
« Reply #10 on: 10/22/09 - 12:28PM »
Looks good. keep the updates coming. Can't wait to get my plasma (showoff!  :P )
EVERY NORMAL MAN MUST BE TEMPTED AT TIMES TO SPIT ON HIS HANDS, HOIST THE BLACK FLAG, AND BEGIN SLITTING THROATS.

Offline YJ_Aaron

  • Level 5
  • *****
  • Posts: 4255
  • Jeep @ Disney
Re: Project "Wing-It"
« Reply #11 on: 10/22/09 - 12:45PM »
Few ?'s for you:

Are you planning on welding on new shackle mounts or at least flipping the stock ones?
Are you going to use the springs for a stretch now or later?
Is it possible for a jeep to ever truely be finished?<br /><br />Only the dead have seen the end of war---Plato

Offline gdowling

  • Level 2
  • **
  • Posts: 150
Re: Project "Wing-It"
« Reply #12 on: 10/22/09 - 01:33PM »

Are you planning on welding on new shackle mounts or at least flipping the stock ones?

Well, I am going to cut off the rear bumper and existing spacers. Then gonna weld some new 2"x4"x1/4" spacers to the existing rear cross member, once those are on I am planning to weld my bumper to them. Then I am planning to relocate the stock shackle mounts to the bottom of the new spacers and weld them on. This is my plan though it is beginning to look like that would make the shackles pretty straight up and down causing issues with getting the correct shackle angle, so I might have to just flip them and weld them to the frame :106:!

Are you going to use the springs for a stretch now or later?

I guess you are asking this because of the conversations about axle upgrades we have had in the past? In any case I am going to use them to stretch it now - I think this should stretch my WB about 6", which is not a ton but it is better than stock WB!
EMAW

Offline YJ_Aaron

  • Level 5
  • *****
  • Posts: 4255
  • Jeep @ Disney
Re: Project "Wing-It"
« Reply #13 on: 10/22/09 - 01:55PM »
So if you're doing a stretch now why did you put new u joints in a driveshaft that will be to short?

Also if the bumper interferes you can always do a boomerang. 

Did you come up with some axles or are you going to abuse those some?  IF they are narrow track I may have some 1 pieces here.
Is it possible for a jeep to ever truely be finished?<br /><br />Only the dead have seen the end of war---Plato

Offline gdowling

  • Level 2
  • **
  • Posts: 150
Re: Project "Wing-It"
« Reply #14 on: 10/22/09 - 02:21PM »
Well to be honest with you I thought they would cut the drive shaft in the middle to lengthen it - is that not how they do it?

I am just going to have to see where the shackle ends up, Austin and I were talking about boomerangs yesterday(I may need them)!

I think I am going to beat the shit out of these for a while first - I just need to make sure I am in front of you on the trail when I bust'em :78:! I know I need 1 piece shafts but funds are starting to run low, and I think I need other stuff worse!
EMAW